The More page is where you can change app settings, modify smart and custom alerts plus access a variety of useful menus and shortcuts.
Lesson Questrade Edge Mobile
The More page, Settings, and Alerts
Discover all the features in the Settings menu including customizable alerts, display preferences, biometric security and more.
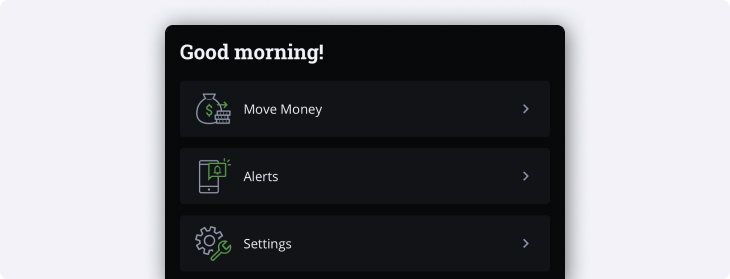
When you open the More page, you’ll be greeted with the main menu options at the top to Move Money, Modify Alerts and change your app Settings.
We’ll cover each of these menus in more detail shortly, but first, let’s take a quick look at the additional options available at the bottom of this screen.
- Tap Market data to open the Questrade customer portal to view or modify your streaming market data options.
- Resources contains links to useful guides, videos and tutorials about using Edge Mobile and Questrade.
- Select Open an account to add an additional account using a browser window.
- Need assistance? Tap Help & Feedback to call or chat with us, or to fill out additional feedback for our teams.
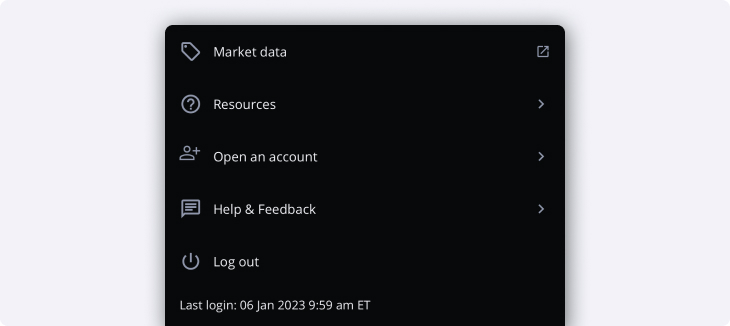
Lastly, at the bottom, you’ll see your last login information which shows the last time you logged into your Questrade account as an additional security feature.
Learn more about this feature in our Account security centre article.
Move Money
When you tap the Move Money menu button, this will bring up a screen with additional options to choose from depending on what you’re looking to do.
At the top, you’ll see shortcuts to Deposit or Withdraw funds to/from your account(s).
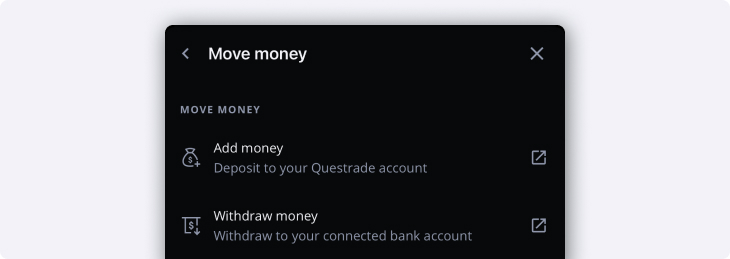
Tap either of these buttons to open a browser window to complete your request.
Learn more about deposits in our Funding article.
Learn more about withdrawals from different account types in this article.
Below this, you’ll see more shortcuts to transfer funds between accounts, exchange currencies or to transfer an account to Questrade.
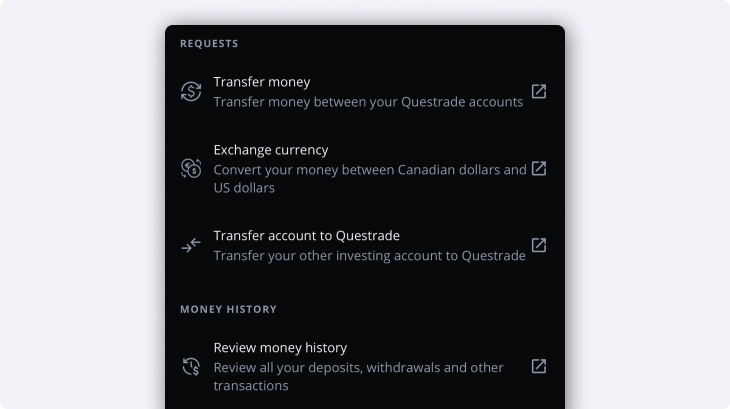
Tap any of these buttons to open a browser window to complete your request.
Lastly, at the bottom you’ll see the Review money history button, tap this to open a browser window showing your detailed account activities on the Questrade customer portal.
Alerts
Before you can start using alerts, you’ll have to review and agree to our Alerts disclaimer.
Check out the short video below to learn more about placing alerts, or continue reading for more in-depth information.
Note: Securities shown are for illustrative, educational, and visual purposes only, and should not be relied upon as financial advice. The information provided is not intended to be and should not be construed as a recommendation, offer, or solicitation to buy or sell.
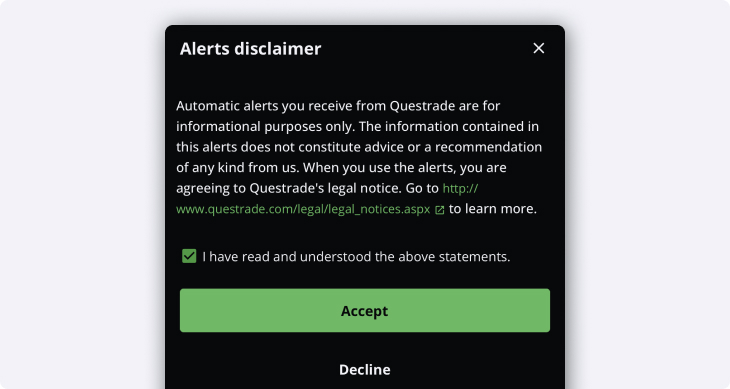
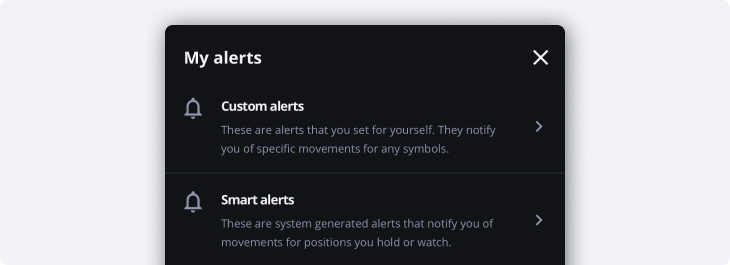
Tap Accept to continue, then tap Alerts again to bring up the bottom menu with two types of alerts to choose from:
- Custom Alerts are set by yourself per security, and can be enabled for any Stock, ETF, Option or Index.
- Smart Alerts are per account, watchlist or position and are system generated.
Custom alerts
Let’s take a look at Custom alerts first. When you first open the screen you’ll be greeted by a blank page with three navigation tabs:
- Active will show your active alerts that have not been triggered.
- Triggered will show alerts that have been triggered by your specific condition.
- Cancelled shows alerts that have expired or been cancelled.

To create a new custom alert, first search for a symbol using the shortcut from this page, or from any of the app’s main navigation features. (i.e. from your positions or watchlist).
- After finding the Stock, ETF, Option or Index you’re looking for, tap the Custom alert icon at the top of the page.
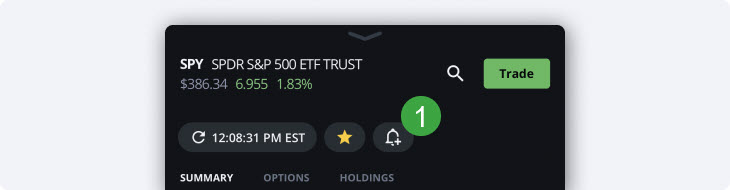
This opens the Create a custom alert page where you can modify and customize your alert’s conditions and variables.
At the top, you’ll see the Symbol, description, last traded price and the P&L for the day.

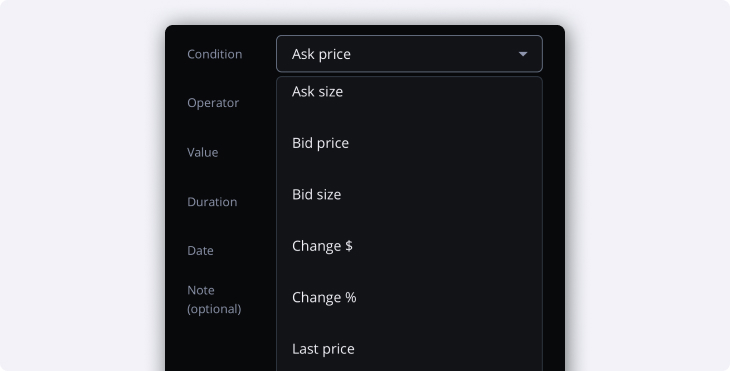
Below the security, there are 3 main menus to choose from depending on the condition you’re looking for.
- Price allows you to set price conditions for your alert based on the bid, ask, change in $ or % and much more related to the price of the security.
- 52 Week lets you set conditions related to the 52 week (yearly) high or low plus yearly volume.
- Volume allows you to create alerts based on the volume of shares/contracts being traded and can help alert you to unusually high volume.
To create your Custom Alert, first choose the condition that you’re looking to measure.
Afterwards, choose the Operator for the measurement. From left to right the operators are:
- Less than (<)
- Less than or equal to (≤)
- Greater than (>)
- Greater than or equal to (≥)
The operator determines your alert’s direction, check out the example in the image below:
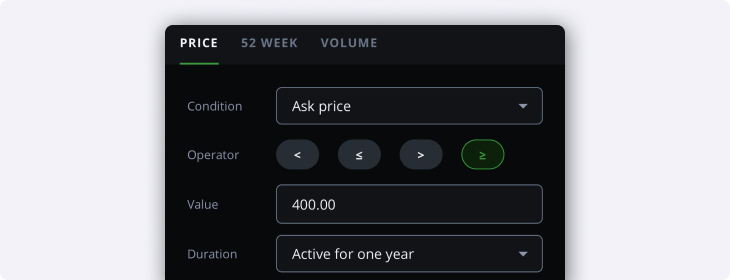
In this example, our alert will trigger if SPY’s Ask price is greater than or equal to $400.
This is also where you set the Value, and the Duration for your alert. You can either select a specific expiry date, or set the alert for one year.
At the bottom, you can enter a custom note for the alert. This can be extremely helpful if you have multiple alerts per security and need to keep track of them.
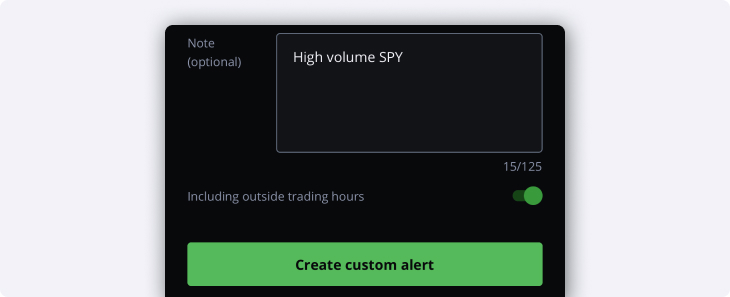
Lastly, you can choose whether this alert is active outside of regular market hours from 9:30 am to 4:00 pm ET. If you select this option, the alert will be active during extended hours trading.
Save your new alert at the bottom by tapping the green Create custom alert button.
Once it’s saved, if you navigate back to your Custom alerts, you’ll see it shown in the list of active alerts.
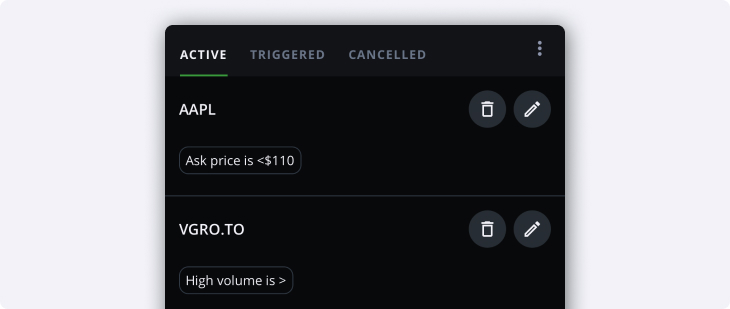
You can easily modify or delete any saved alerts from this page by tapping the pencil, or trash can icons on the right hand side.
If an alert’s conditions are met, you’ll be notified according to your alert preferences. You can change these by tapping the menu with the 3 dots on the right, then select Change alert preferences.
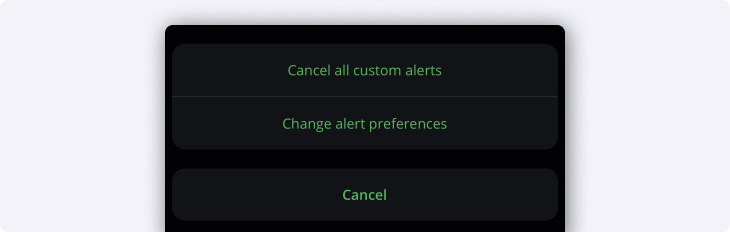
In your alert preferences you can choose whether you’re notified by Email or SMS as well as explore other customization options.
After an alert is triggered, it will appear on the middle tab. You can easily reactivate an alert from this page by tapping the button on the right.
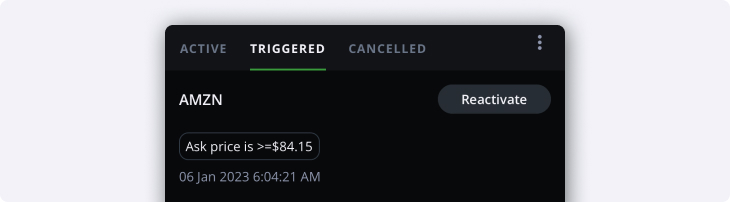
Tip: Use the menu with the 3 dots on the top right to quickly reactivate all your alerts at the same time.
Smart alerts
Smart alerts are default system generated alerts for your account(s), watchlists(s) and positions.
Compared to Custom alerts, smart alerts can look at the price action or volume of your entire account or certain watchlists instead of just individual symbols.
When you first open Smart alerts, you’ll be greeted with a page showing your default alerts for your account(s) and watchlists.
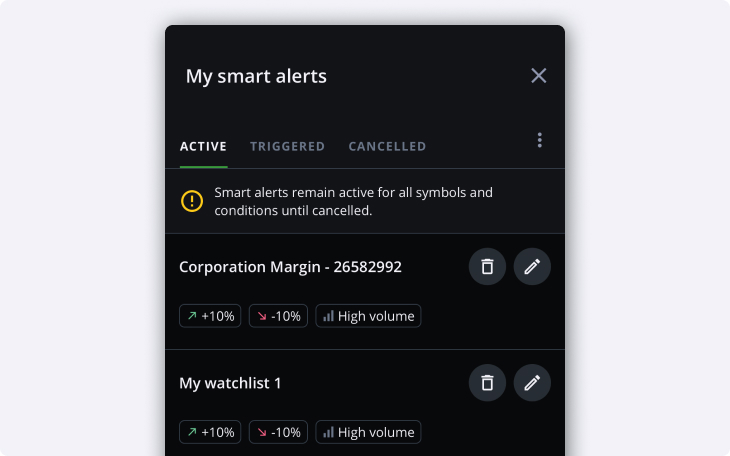
Unlike Custom alerts, Smart alerts stay active until cancelled, and do not need to be reactivated after the conditions are met.
You can easily modify or delete any saved alerts from this page by tapping the pencil, or trash can icons on the right hand side.
If an alert’s conditions are met, you’ll be notified according to your alert preferences. You can change these by tapping the menu with the 3 dots on the right, then select Change alert preferences.
When you tap the edit icon, you’re able to add or remove conditions for the Smart alert. By default, the 10% daily gain or loss and high volume alerts are enabled.

Tap any of the conditions on this page to add or remove them from your Smart alert.
Tip: You can enable multiple price alerts at the same time.
Prefer using the defaults? Tap the button at the top right to reset this specific smart alert.
Settings
When you tap the settings menu from the More page, this page will bring up additional customization options for your app, order entry and login/security.
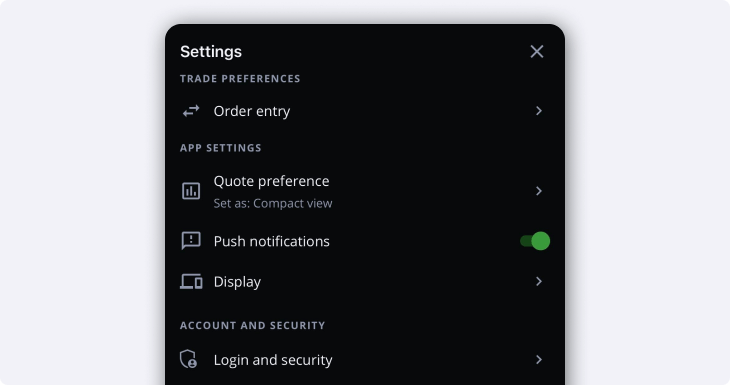
- Order entry under allows you to modify your trade preferences like the default amount of shares in an order.
- App Settings allow you to change the way quotes are displayed, turn Push notifications on or off, and modify other Display preferences.
- Login & Security brings up options for your account and security such as multi-factor authentication.
Trade preferences
In the Order entry menu, you can modify your order’s default values at the top. This is the default amount of shares in a blank order for equities (Stocks/ETFs) or Options contracts.
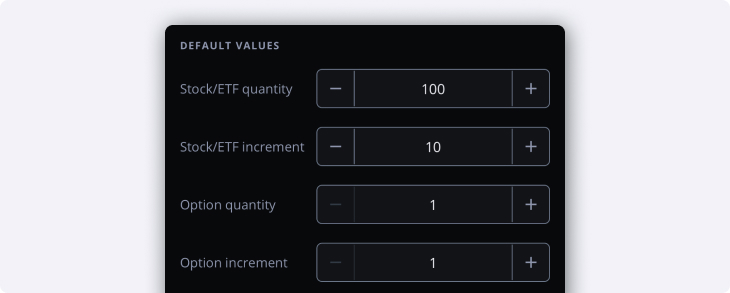
Increment is how many shares/contracts this number increases by when you tap the plus or minus buttons on the order entry page.
At the bottom of this page, you’ll see more customization options for your orders including the order type, duration, and default account used.
Choose from order types like Market, Limit or even more advanced order types using the Order type menu.
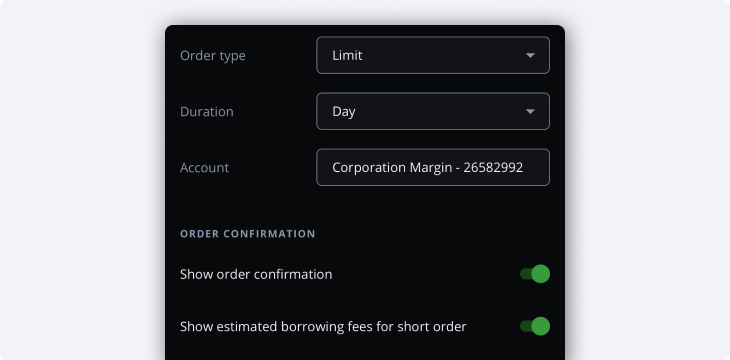
Select your default duration, you can choose from:
- Day: Orders valid until 4pm ET (market close)
- Good ‘till cancelled (GTC): Orders valid for up to 90 days
- Good ‘till date (GTD): Orders valid until a certain calendar date up to 90 days
- Good ‘till extended market (GTEM): Orders that are eligible for execution outside of regular market hours.
If you have multiple Questrade accounts, you can also choose your default account for order entry here.
Lastly, at the bottom you can toggle order confirmations and borrowing fee confirmations on or off depending on your preferences.
Tip: This can be helpful if you’re making extremely rapid transactions where a few seconds matters, but can also be potentially risky. With order confirmation turned off, it can put you at risk of an unintentional trade. Due to this, we highly recommend keeping this feature on.
App settings
The app settings menus allow you to change the way Edge Mobile looks and feels, and gives you a handy toggle to turn Push notifications on or off.
Remember: Push notifications are also controlled under your phone’s general settings, if you use a “do not disturb” mode or similar, push notifications may not be displayed.
The Quote preference menu lets you toggle between using a compact or full quote when you search for a symbol, or tap a security in your watchlist(s) or positions/orders.
- Compact quotes open a “half-drawer” of information when you want to see a security at a glance. You’re able to easily expand the compact quote anytime by sliding the drawer up.
- Full quotes load the full quote, mini chart and level 1 information for the security right away.
Display
The Display settings menu allows you to modify your display preferences within the app. This is where you can switch between a 12 or 24 hour clock, enable commas in numbers and more.
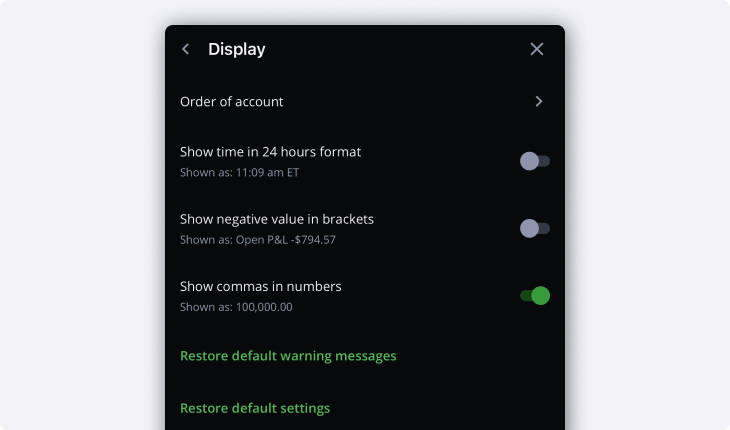
At the top, you can also change the default order of your accounts and how they’re shown within the app. If you have multiple Questrade accounts, this can be extremely helpful to reorder your accounts to your preference.
Lastly, at the bottom you can restore your default warning messages or settings if desired.
Account and security
In the Login & Security menu, you can view more security options for your app and account such as enabling biometric ID, or 2-step verification.
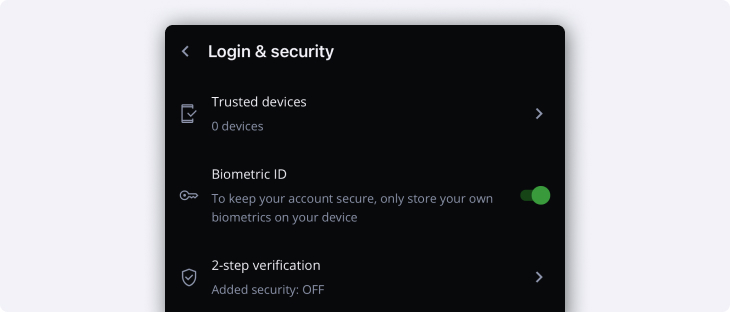
Tap Trusted devices at the top to see a list of your current trusted devices for your account.
This is where you can also enable or disable Biometric ID (such as Face or TouchID) for logging into your Edge Mobile app.
Learn more about your account profile and security options including mobile authenticators.
Note: The information in this blog is for information purposes only and should not be used or construed as financial, investment, or tax advice by any individual. Information obtained from third parties is believed to be reliable, but no representations or warranty, expressed or implied is made by Questrade, Inc., its affiliates or any other person to its accuracy.
Related lessons
Want to dive deeper?
Funding your account
Explore the many different ways you can deposit funds to your Questrade account(s).
View lessonRead next
Questrade trading platforms
Discover all of Questrade’s trading platforms and decide which one is best suited for you, and your investment style.
View lessonExplore
Explore QuestMobile
Learn all about QuestMobile, the easy-to-use trading app designed for anyone who wants to start investing in the stock market.
View lesson